Finally got around to installing the wood burning stove this weekend. I had bought a Sardine model stove from Navigator Stove Works, and it has been sitting around for at least seven or eight months. I found a nice flat rock on the property, and built a cradle for it out of some oak I had milled. I attached the stove to the rock with concrete anchor bolts. It was a pretty rustic look, but Andrew at NSW had recommended that the cook surface be at least 28 inches from the floor, and the cradle accomplished this, plus allowed for using another piece of native rock for a heat shield.
It also took a while for the pipe to arrive due to a snafu at the factory. And then after some initial layout and head scratching, I realized that I needed two more sections of pipe plus two adjustable elbows.
So now with all the components available, my wife and I headed up and got to work. We puzzled for a bit on exactly where the hole in the roof should go, but once that decision was made, we just went for it. Point of no return.
Cutting the hole was a bit of a pain. I drilled a series of holes up through the roof around the perimeter I had scribed, but it was slow going and I coughed up a lot of sawdust. It was not much easier once I got up on the roof and tried cutting through the metal with tin snips. But I eventually got the metal out of the way, and was able to cut through the OSB roof deck, ruining a half dozen hack saw blades in the process.
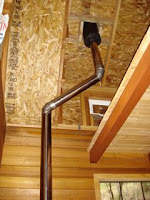
Now for the fun part. I pushed the ceiling adapter up through the hole, and secured it to the bracing I had framed inside. I installed the chimney pipe in the adapter, and then slid the pipe boot over the chimney.
The pipe boot had been recommended by Andrew, since the regular flashing that he carries does not work for metal roofs.
This is the picture from their web site. Looks pretty good.
Here's what mine looked like.
My wife had been steadying the ladder, but once she got a good look at it, she said, "Pipe boot? More like pipe butt! That thing is butt ugly!"
It wasn't quite so bad once the rain cap was installed, and from a bit of a distance you might not notice. The important thing was, would it keep out the weather, and would the chimney draft be decent. We'd have to wait to check for leaks, but after connecting the interior piping, we immediately built a small fire in the stove. The draft was very nice, and the damper was working well.
We got our chance to verify the weather-worthiness the next day. We had spent the night at my brother's cabin, which is about twenty minutes away, and has all the amenities: kitchen, shower, heat, and a very comfy bed. The next day a pretty steady drizzle had descended on the foothills. After breakfast and some cleanup, we drove back down to our place, keeping our fingers crossed.
The way the pipe boot had turned out was disappointing, but nothing compared to finding a black puddle on the floor the next morning. Before installing the pipe boot, I had tried to seal the edges of the hole with black pipe cement, so when the roof leaked, the water was full of yucky black sediment. We cleaned it up, and put a bucket under the leaky spot. The leak was actually pretty slow, and seemed to be in just one place. I tried adding some more silicon from up on the roof, but the leak persisted. Oh well, time for plan B. I'm just not sure what plan B is quite yet.
But we made another fire, and the place heated up quite nicely. Here are a few more pics.


